Posted on Leave a comment

Celebrating Cabbage: A Culinary Journey from Farm to Table

Introduction: Welcome back to our local harvest delivery produce box! This week, we’re putting the spotlight on a humble yet versatile vegetable – cabbage. Bursting with flavor and packed with nutrients, cabbage is a fantastic addition to your culinary adventures. Join us as we explore creative ways to make the most of this wonderful vegetable.

  1. Farm Fresh Goodness: Our commitment to delivering the freshest produce begins on local farms that prioritize sustainability and quality. Cabbages are carefully cultivated, handpicked, and sent straight to your doorstep, ensuring you get the best nature has to offer.
  2. Varieties Galore: Cabbage comes in various shapes and colors, each with its unique flavor profile. From the classic green cabbage to the vibrant red and savoy varieties, our produce box may surprise you with its diverse offerings. Embrace the variety and experiment with different types in your recipes.
  3. Cabbage 101: Before diving into recipes, let’s understand the basics. Cabbage is not only low in calories but also high in fiber, vitamins, and minerals. It’s known for its anti-inflammatory properties and is an excellent source of antioxidants. Include cabbage in your meals for a health boost.
  4. Classic Coleslaw Reinvented: Coleslaw is a classic favorite, but why not give it a modern twist? Experiment with different dressings like apple cider vinaigrette or Asian-inspired sesame dressing. Toss in some shredded carrots, radishes, and a handful of fresh herbs for a burst of color and flavor.
  5. Stuffed Cabbage Rolls: Take your culinary skills up a notch with stuffed cabbage rolls. Fill blanched cabbage leaves with a savory mixture of ground meat, rice, and spices. Bake them to perfection, and enjoy a comforting and hearty meal that’s perfect for family dinners.
  6. Spicy Korean Kimchi: Dive into Korean cuisine by making your own kimchi at home. Ferment shredded cabbage with a spicy blend of chili, garlic, and ginger. The result? A probiotic-rich condiment that adds a kick to your meals.
  7. Roasted Cabbage Steaks: Elevate cabbage to the star of the show by roasting thick cabbage slices. Drizzle them with olive oil, sprinkle your favorite seasonings, and roast until golden brown. These cabbage steaks are not only delicious but also a visually stunning addition to your plate.
  8. Cabbage and Potato Soup: Embrace the comforting warmth of a cabbage and potato soup. Simmer cabbage, potatoes, onions, and garlic in a flavorful broth for a nourishing bowl that’s perfect for colder days.

Conclusion: Cabbage, with its versatility and nutritional benefits, is a culinary gem waiting to be explored. From coleslaw to stuffed rolls, there’s a cabbage recipe for every palate. Enjoy the farm-fresh goodness delivered to your door and embark on a culinary journey with cabbage as your guide. Stay tuned for more exciting produce box adventures!

Classic Coleslaw

1 cup mayonnaise

1½ Tbsp. apple cider vinegar or white vinegar

1 Tbsp. honey

¾ tsp. celery seeds

1 tsp. Diamond Crystal or ½ tsp. Morton kosher salt

½ tsp. freshly ground black pepper

½ medium green cabbage, very thinly sliced (about 4 cups)

½ medium red cabbage, very thinly sliced (about 4 cups)

2 medium carrots, peeled; julienned or grated

Preparation

  1. Whisk 1 cup mayonnaise1½ Tbsp. apple cider vinegar or white vinegar1 Tbsp. honey¾ tsp. celery seeds1 tsp. Diamond Crystal or ½ tsp. Morton kosher salt, and ½ tsp. freshly ground black pepper in a large bowl to combine.
  2. Add ½ medium green cabbagevery thinly sliced½ medium red cabbage, very thinly sliced, and 2 medium carrots, peeled; julienned or grated to dressing and toss to coat. Cover and chill until ready to serve. 
  3. Do Ahead: Coleslaw can be made 8 hours ahead. Keep chilled. 
Posted on Leave a comment

Exploring Fresh Broccolini

Hey, fellow foodies! It’s Julie here, and I’m excited to share a kitchen favorite that has been adding a touch of magic to my recipes – broccolini. If you’re all about fresh, farm-to-table goodness, you’re in for a treat!

Have you ever tried broccolini? It’s like a flavor symphony with its mild and sweet notes, effortlessly enhancing your dishes. Trust me, this veggie is a game-changer. Tender stems and crisp florets – that’s broccolini for you. It brings a delightful textural dance to your plate, perfect for salads, stir-fries, and those quick side dishes I’ve come to love.

Fresh Broccolini from Local Harvest Delivery

We all crave freshness in our meals, right? That’s where fresh broccolini from Local Harvest Delivery steals the show. It’s not just good; it’s exceptional, adding a burst of flavor to your culinary creations.

Whether you’re a seasoned chef or a kitchen adventurer like me, broccolini is your ally. Its slender shape and quick cooking time make it a go-to for vibrant salads and flavorful pasta dishes – ideal for those on-the-go days.

Effortless Cooking

Short on time? Join the club! Broccolini’s thin stems and quick cooking time mean you can whip up wholesome, delicious meals without the kitchen marathon. Quick, tasty, and hassle-free – my kind of cooking! Your meals should look as good as they taste, right? Broccolini’s vibrant green color and elegant presentation add a touch of sophistication to your plate – a feast for your eyes and your taste buds.

Happy cooking, friends!

Italian-Inspired Garlic Broccolini Recipe: A Burst of Flavor on Your Plate

If you’re a fan of Italian flavors and looking to elevate your veggie game, this Garlic Broccolini recipe is the perfect addition to your repertoire. With the simplicity of fresh ingredients and the boldness of garlic, this dish brings a touch of Mediterranean flair to your table. Let’s get cooking!

Ingredients:

  • 1 bunch of fresh broccolini, washed and trimmed
  • 3 tablespoons extra virgin olive oil
  • 4 cloves garlic, thinly sliced
  • 1 teaspoon red pepper flakes (adjust to taste)
  • Salt and black pepper to taste
  • Zest of one lemon (optional)
  • Grated Parmesan cheese for garnish

Instructions:

  1. Prepare the Broccolini: Wash and trim the broccolini, cutting any thick stems to ensure even cooking. Pat them dry with a paper towel.
  2. Blanch the Broccolini: Bring a pot of salted water to a boil. Blanch the broccolini for 2-3 minutes, or until they are bright green and slightly tender. Immediately transfer them to a bowl of ice water to stop the cooking process. Drain and set aside.
  3. Sauté Garlic and Red Pepper Flakes: In a large skillet, heat the olive oil over medium heat. Add the thinly sliced garlic and red pepper flakes. Sauté for 1-2 minutes or until the garlic is fragrant and just beginning to turn golden.
  4. Cook Broccolini: Add the blanched broccolini to the skillet. Toss them in the garlic-infused oil, ensuring they are well-coated. Cook for an additional 3-4 minutes, allowing the broccolini to absorb the flavors.
  5. Season and Finish: Season the broccolini with salt and black pepper to taste. If desired, add the zest of a lemon for a burst of freshness. Toss everything together until well combined.
Posted on Leave a comment

🎁✨ Holiday Gift Idea Alert! 🌟🛍️

GIFT CARDS AVAILABLE FOR LOCAL HARVEST DELIVERY🌸👩‍🌾

Support Local, Celebrate Women-Owned!

This festive season, give the gift of freshness, flavor, and community support! 🎄🍇🎁 Our local, woman-owned business, Local Harvest Delivery is the perfect place to find unique, handpicked produce and artisanal goodies, delivered right to your doorstep.

🌿 Why Choose Us?

  • 🌈 Locally Sourced: We prioritize local farmers and artisans, bringing you the freshest and finest produce and artisanal items.
  • 🌸 Women Empowerment: Support our woman-owned business and contribute to the growth of female entrepreneurship in our community.
  • 🚚 Convenient Delivery: Enjoy the ease of doorstep delivery, making your holiday season stress-free and full of delightful surprises.

🎉 Gift Certificate ! 🎟️🎀 This holiday season, surprise your loved ones with a gift certificate from our store! Perfect for those who appreciate quality, sustainability, and a touch of local charm of our Santa Barbara region.

🎁 What’s Included:

  • A selection of fresh, seasonal produce
  • Artisanal treats and delights
  • The joy of supporting local business

💖 How to Order:

  1. 🌐 Visit our website https://localharvestdelivery.com/product/gift-cards/
  2. 🎁 Select the desired gift certificate amount
  3. Enter the recipient information
  4. 💳 Complete your purchase securely online

🌟 Spread the Love, Share the Joy! Tag a friend who loves fresh, local produce and deserves a holiday treat. Let’s come together to celebrate the season with flavor, freshness, and support for our local community!

Posted on Leave a comment

Green Garlic Pesto recipe

Green garlic pesto is a delightful variation of traditional pesto that incorporates the mild and fresh flavors of green garlic. Here’s a simple recipe for making green garlic pesto:

Ingredients:

  • 1 cup green garlic (white and light green parts), finely chopped
  • 1/2 cup fresh basil leaves
  • 1/2 cup fresh parsley leaves
  • 1/3 cup pine nuts or walnuts, toasted
  • 1/2 cup Parmesan cheese, grated
  • 1/2 cup extra-virgin olive oil
  • Salt and pepper to taste
  • Squeeze of fresh lemon juice (optional)

Instructions:

  1. Prepare the Green Garlic:
    • Wash and finely chop the white and light green parts of the green garlic. You can also include some of the tender green leaves for added flavor.
  2. Toast the Nuts:
    • In a dry skillet over medium heat, toast the pine nuts or walnuts until they are lightly golden and fragrant. Stir frequently to prevent burning. Remove from heat and let them cool.
  3. Combine Ingredients:
    • In a food processor, combine the chopped green garlic, basil, parsley, toasted nuts, and grated Parmesan cheese.
  4. Blend:
    • Pulse the ingredients until they are finely chopped and well combined. Scrape down the sides of the processor to ensure everything is evenly mixed.
  5. Add Olive Oil:
    • With the food processor running, slowly drizzle in the extra-virgin olive oil until the pesto reaches your desired consistency. You can add more or less oil based on your preference.
  6. Seasoning:
    • Season the pesto with salt and pepper to taste. If desired, add a squeeze of fresh lemon juice for a citrusy brightness.
  7. Adjust Consistency:
    • If the pesto is too thick, you can add more olive oil or a splash of water to achieve the desired thickness.
  8. Taste and Adjust:
    • Taste the pesto and adjust the seasoning, oil, or lemon juice as needed. You can customize it to suit your preferences.
  9. Serve or Store:
    • Use the green garlic pesto immediately as a sauce for pasta, a spread for sandwiches, or a topping for grilled vegetables. Alternatively, store it in an airtight container in the refrigerator for a few days.

Green garlic pesto adds a vibrant and herby flavor to dishes, and its versatility makes it a wonderful condiment in a variety of recipes. Enjoy experimenting with this fresh and aromatic pesto

Posted on Leave a comment

Green Goddess Salad with Little Gem Lettuce, Carrot, Collard Greens, and Parsley

Ingredients:

  • 1 head of Little Gem lettuce, washed and chopped
  • 1 large carrot, julienned
  • 4-5 collard green leaves, stems removed and thinly sliced
  • 1 cup fresh parsley leaves, chopped
  • 1/2 cup cherry tomatoes, halved (optional, for added sweetness)
  • 1/4 cup extra virgin olive oil
  • 2 tablespoons apple cider vinegar
  • 1 tablespoon Dijon mustard
  • 1 clove garlic, minced
  • Salt and pepper to taste
  • 1/4 cup crumbled feta cheese (optional, for extra flavor)

Instructions:

  1. Prepare the Greens:
    • Wash and chop the Little Gem lettuce into bite-sized pieces.
    • Julienne the carrot into thin strips.
    • Remove the stems from the collard green leaves and thinly slice the leaves.
    • Chop the fresh parsley leaves.
  2. Assemble the Salad:
    • In a large salad bowl, combine the Little Gem lettuce, julienned carrot, sliced collard greens, and chopped parsley.
    • If using, add the halved cherry tomatoes for extra sweetness.
  3. Prepare the Dressing:
    • In a small bowl, whisk together the extra virgin olive oil, apple cider vinegar, Dijon mustard, minced garlic, salt, and pepper. Adjust the seasoning to your taste.
  4. Dress the Salad:
    • Pour the dressing over the salad and toss gently to ensure an even coating.
  5. Serve:
    • Divide the salad among serving plates or bowls.
    • If desired, sprinkle crumbled feta cheese on top for an extra burst of flavor.
  6. Enjoy:
    • Serve immediately and enjoy the crisp, flavorful goodness of this Green Goddess Salad!

Feel free to customize the salad with additional ingredients like nuts or seeds for added crunch, or grilled chicken for a protein boost. This versatile recipe allows you to savor the wholesome goodness of fresh, seasonal ingredients.

Posted on Leave a comment

Kiwi Season is Here

Hey, fantastic folks! Guess what’s making its grand entrance at our tables? It’s kiwi season, and we’re all about bringing the freshness straight to you!

Why Kiwi Deserves the Spotlight:

We believe in connecting you with the best nature has to offer, and these kiwis are no exception. It’s not just a fruit; it’s a celebration of local flavors and seasonal delights.

Kiwi Culinary Adventures:

Now, let’s talk about making the most of this kiwi season in your kitchen:

  1. Zesty Fruit Bliss: Elevate your fruit game by mixing kiwis with other seasonal favorites. Drizzle with local honey for that perfect touch.
  2. Morning Kiwi Boost: Blend in the goodness of kiwis with berries, banana, and a splash of coconut water for a refreshing start to your day.
  3. Grilled Goodness: Dice up kiwis for a show-stopping salsa with tomatoes, red onion, cilantro, and a squeeze of lime. Perfect to complement your favorite grilled dishes.
  4. Parfait Pleasure: Transform your desserts with kiwis. Layer them with yogurt and granola for a visually stunning and delicious parfait.

Here’s to freshness, flavor, and fantastic kitchen adventures! 🥝✨

Posted on Leave a comment

Recipe for FENNEL

Fennel, Kale, and Apple Salad:

Ingredients:

  • 1 large fennel bulb, thinly sliced
  • 4 cups kale, stems removed and leaves thinly sliced
  • 1 large apple, cored and thinly sliced (use a sweet variety like Fuji or Honeycrisp)
  • 1/2 cup chopped toasted walnuts
  • 1/4 cup crumbled feta cheese (optional)
  • 1/4 cup dried cranberries or raisins (optional)

For the Dressing:

  • 1/4 cup extra-virgin olive oil
  • 2 tablespoons apple cider vinegar
  • 1 tablespoon Dijon mustard
  • 1 tablespoon honey or maple syrup
  • Salt and pepper to taste

Instructions:

  1. In a large salad bowl, combine the sliced fennel, kale, apple, toasted walnuts, feta cheese, and dried cranberries or raisins if using.
  2. In a small bowl or jar, whisk together the olive oil, apple cider vinegar, Dijon mustard, honey or maple syrup, salt, and pepper. Adjust the seasonings to taste.
  3. Pour the dressing over the salad ingredients.
  4. Toss the salad until the dressing evenly coats the ingredients. Massage the kale slightly with your hands to help tenderize it.
  5. Allow the salad to sit for a few minutes to let the flavors meld.
  6. Serve the salad as a refreshing and nutritious side dish. Optionally, you can garnish with additional toasted walnuts or crumbled feta cheese before serving.

This salad combines the crispness of fennel, the hearty texture of kale, and the sweetness of apples, creating a delightful mix of flavors and textures. The dressing adds a zesty and slightly sweet touch to tie everything together. Enjoy this salad as a light lunch or a side dish with your favorite main course!

Roasted Fennel:

Ingredients:

  • 2 large fennel bulbs, trimmed and cut into wedges
  • 2 tablespoons olive oil
  • 1 teaspoon balsamic vinegar
  • 1 teaspoon honey
  • Salt and pepper to taste
  • Freshly grated Parmesan cheese (optional)
  • Chopped fresh herbs (such as thyme or rosemary) for garnish

Instructions:

  1. Preheat your oven to 400°F (200°C).
  2. In a bowl, toss the fennel wedges with olive oil, balsamic vinegar, honey, salt, and pepper until evenly coated.
  3. Arrange the fennel wedges on a baking sheet in a single layer.
  4. Roast in the preheated oven for about 25-30 minutes or until the edges are golden brown and the fennel is tender, turning them halfway through the cooking time.
  5. Optional: Sprinkle freshly grated Parmesan cheese over the roasted fennel during the last 5 minutes of baking.
  6. Remove from the oven, garnish with chopped fresh herbs, and serve.

These recipes highlight the distinct flavor of fennel, whether it’s crisp and refreshing in a salad or caramelized and savory when roasted. Adjust the seasonings according to your taste preferences, and feel free to customize the recipes with additional ingredients if you like!

Posted on Leave a comment

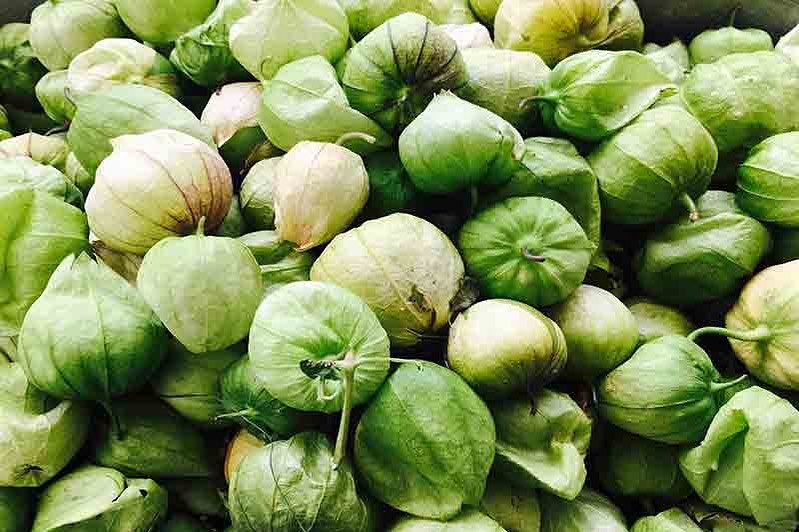
TOMATILLO?

Growing Tomatillos:

  1. Planting:
    • Tomatillos are typically grown from seeds. Start seeds indoors 6-8 weeks before the last expected frost. Transplant the seedlings outdoors once the soil has warmed.
    • Choose a sunny location with well-drained soil.
  2. Spacing:
    • Space the tomatillo plants about 3 feet apart. They can grow quite large, and proper spacing allows for good air circulation.
  3. Watering:
    • Tomatillos prefer consistent moisture. Water regularly, especially during dry periods, but be cautious not to overwater, as they don’t like to sit in waterlogged soil.
  4. Support:
    • Provide support for the tomatillo plants, as they can become top-heavy when laden with fruit. Cages or stakes work well.
  5. Pruning:
    • While not strictly necessary, pruning can help manage the size of the plants and improve air circulation.
  6. Harvesting:
    • Tomatillos are ready to harvest when the husk splits and the fruit fills it. The fruit should be firm and green. Harvest when the fruit is still green and before it turns yellow or brown.

Storing Tomatillos:

  1. Fresh Storage:
    • Store fresh tomatillos in a paper bag in the refrigerator. They can be kept for up to two weeks. Keep them in their husks until ready to use.
  2. Freezing:
    • If you have an abundance of tomatillos, consider freezing them. Remove the husks and wash the tomatillos. You can freeze them whole or sliced. Blanching before freezing can help preserve their quality.
  3. Canning:
    • Tomatillos can be canned in the form of salsa verde or whole. Follow safe canning procedures to ensure the preservation of your tomatillo products.
  4. Drying:
    • Tomatillos can be dried, but they are often better suited for salsa and sauces. If you want to try drying them, slice them thinly and use a dehydrator or oven at a low temperature.
  5. Pickling:
    • Pickling tomatillos can be another way to preserve them. This involves submerging them in a vinegar-based brine.

Remember to always follow proper food safety guidelines when storing tomatillos or any other produce. Proper storage methods can help you enjoy your homegrown tomatillos for an extended period.

TOMATILLO CORN RELISH RECIPE

Tomatillo corn relish is a delicious and versatile condiment that can be used to add flavor and brightness to a variety of dishes. Here’s a simple recipe for you:

Ingredients

  • 1 cup fresh or grilled corn kernels (about 2 ears of corn)
  • 1 cup tomatillos, husked, rinsed, and diced
  • 1/2 cup red onion, finely chopped
  • 1/4 cup fresh cilantro, chopped
  • 1 jalapeño pepper, seeds and ribs removed, finely chopped
  • 1 clove garlic, minced
  • Juice of 1 lime
  • 1 tablespoon olive oil
  • Salt and pepper to taste

Instructions:

  1. Prepare the Ingredients:
    • Husk and rinse the tomatillos. Dice them into small pieces.
    • If you’re using fresh corn, remove the kernels from the cobs. If you prefer a smokier flavor, you can grill the corn first before removing the kernels.
    • Finely chop the red onion, jalapeño pepper (adjust the amount according to your spice preference), and cilantro.
    • Mince the garlic.
  2. Combine Ingredients:
    • In a large bowl, combine the tomatillos, corn kernels, red onion, jalapeño, cilantro, and garlic.
  3. Dress the Relish:
    • Drizzle the olive oil over the mixture.
    • Squeeze the juice of one lime into the bowl.
    • Season with salt and pepper to taste.
  4. Mix Well:
    • Gently toss all the ingredients together until well combined.
  5. Chill:
    • For the best flavor, let the tomatillo corn relish chill in the refrigerator for at least 30 minutes before serving. This allows the flavors to meld.
  6. Serve:
    • Serve the tomatillo corn relish as a side dish, on top of grilled chicken or fish, or as a topping for tacos, nachos, or salads.

Feel free to adjust the quantities and ingredients based on your preferences. This relish adds a burst of freshness and tanginess to your dishes, making it a great addition to your culinary repertoire. Enjoy!

Posted on Leave a comment

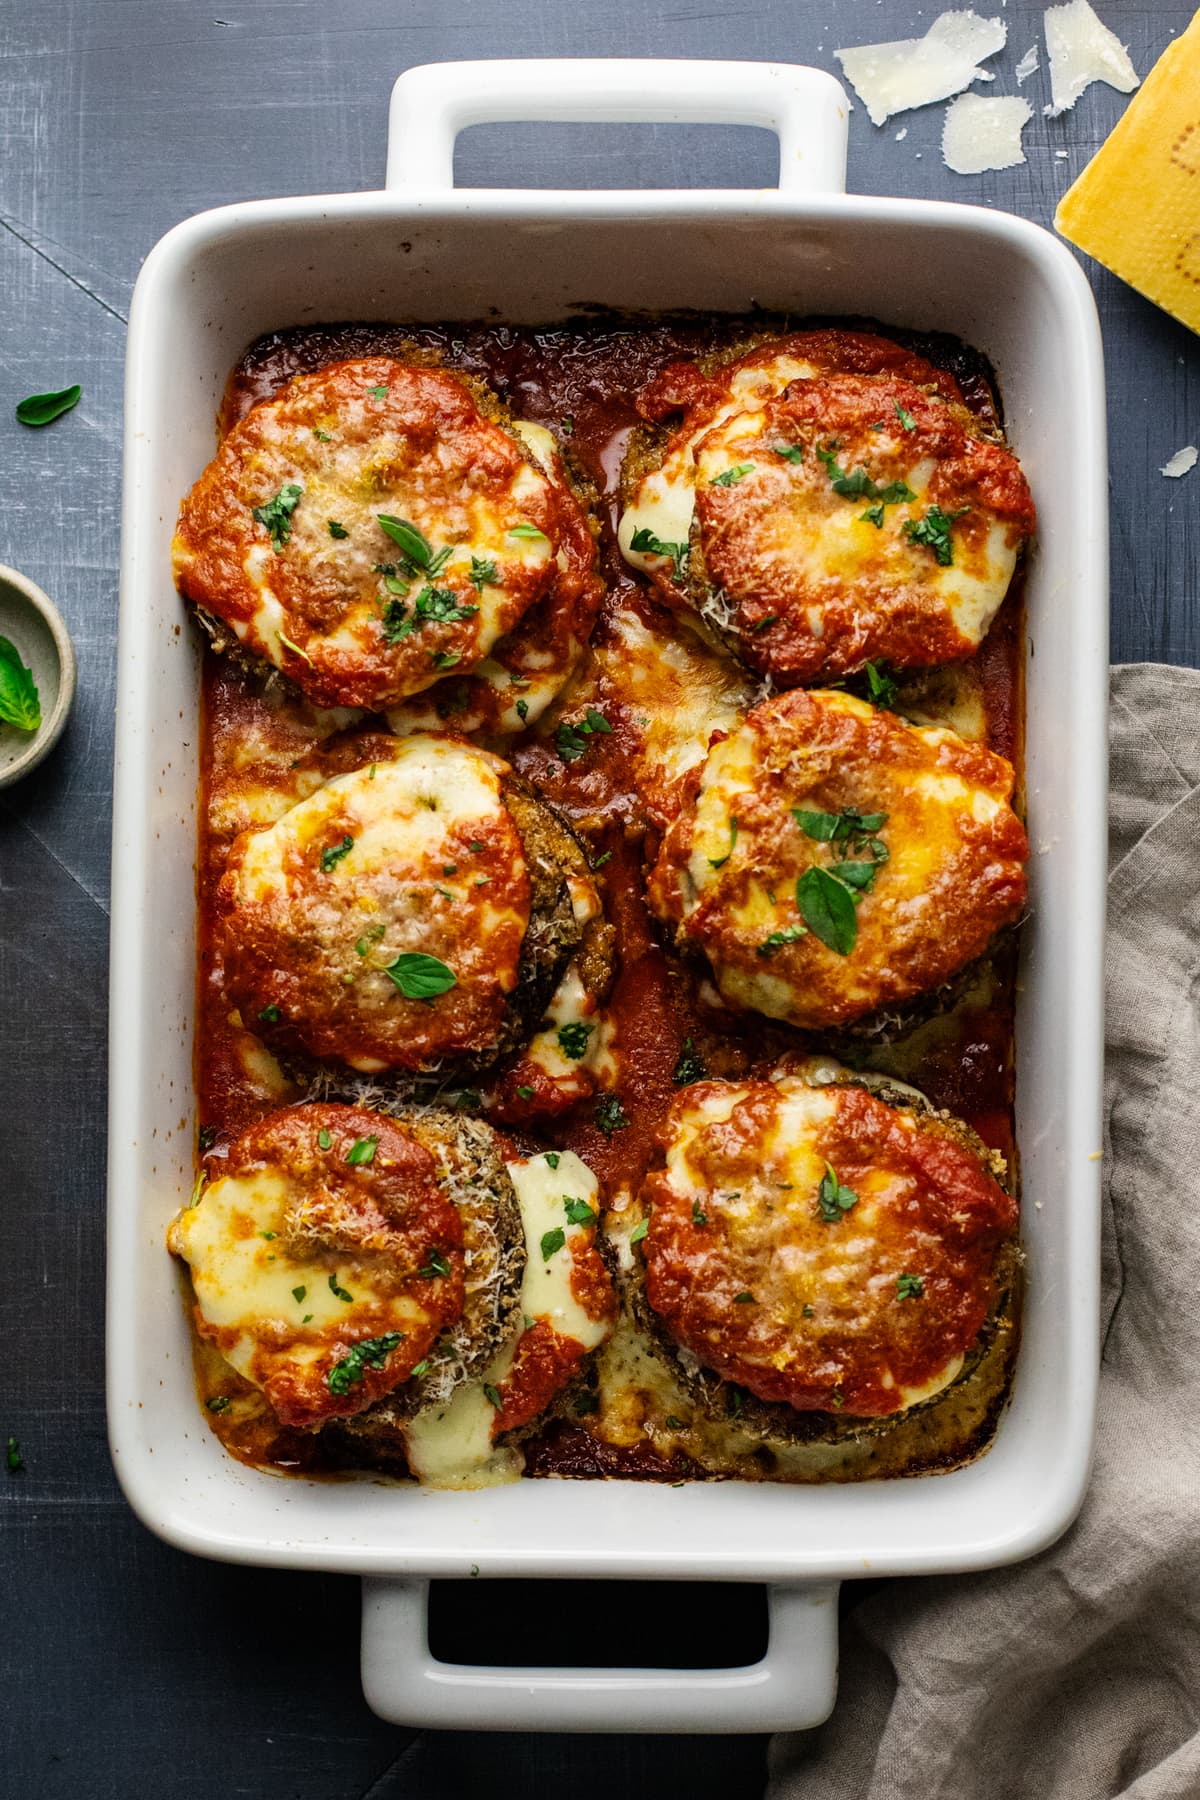
Eggplant Parmesan

Eggplant Parmesan is a delicious Italian dish made with layers of breaded and fried eggplant slices, marinara sauce, and melted cheese. Here’s a basic recipe for making Eggplant Parmesan:

Ingredients:

  • 2 large eggplants
  • 2 cups all-purpose flour
  • 4 large eggs
  • 2 cups Italian-style breadcrumbs
  • 1 cup grated Parmesan cheese
  • 2 cups marinara sauce (homemade or store-bought)
  • 2 cups shredded mozzarella cheese
  • 1/4 cup chopped fresh basil
  • 1/4 cup chopped fresh parsley
  • Olive oil for frying
  • Salt and black pepper to taste

Instructions:

  1. Preheat your oven to 375°F (190°C).
  2. Peel the eggplants and slice them into 1/2-inch thick rounds. Place the eggplant slices in a colander and sprinkle them with salt. Let them sit for about 30 minutes to release excess moisture and bitterness. After 30 minutes, rinse the eggplant slices and pat them dry with paper towels.
  3. In three separate shallow dishes, prepare a breading station. In the first dish, add the flour. In the second dish, beat the eggs. In the third dish, combine the breadcrumbs and grated Parmesan cheese.
  4. Dredge each eggplant slice in the flour, ensuring both sides are coated, then dip it into the beaten eggs, and finally coat it with the breadcrumb mixture. Place the breaded eggplant slices on a baking sheet.
  5. In a large skillet, heat about 1/4 inch of olive oil over medium-high heat. Fry the breaded eggplant slices in batches until they are golden brown, about 2-3 minutes per side. Remove the fried slices and place them on paper towels to drain excess oil.
  6. In a baking dish, spread a thin layer of marinara sauce to cover the bottom. Place a layer of fried eggplant slices on top. Add a layer of mozzarella cheese, followed by more marinara sauce, and a sprinkle of chopped basil and parsley. Repeat this layering process until all the ingredients are used up, finishing with a layer of sauce, mozzarella, and herbs on top.
  7. Cover the baking dish with aluminum foil and bake in the preheated oven for 25-30 minutes. Then, remove the foil and bake for an additional 10-15 minutes or until the cheese is melted and bubbly, and the eggplant is tender.
  8. Let it rest for a few minutes before serving. Garnish with more fresh basil and Parmesan cheese, if desired.

Enjoy your homemade Eggplant Parmesan! It’s a great dish to serve with a side of pasta or a green salad.

Posted on Leave a comment

Napa Cabbage: A Fresh Twist from Local Harvest Delivery

This week, your CSA box is bringing you the ever-versatile Napa cabbage, and we’ve got the inside scoop on this kitchen superstar. Plus, we’re sharing a simple and delicious braised Napa cabbage recipe. Let’s get started!

Meet Napa Cabbage

Napa cabbage, also known as Chinese cabbage, is a leafy green that’s all about crispness and mild sweetness. Here’s what you need to know:

1. Looks Matter: Napa cabbage boasts an elongated, pale green head with crinkled leaves, quite different from the round cabbage you might be familiar with.

2. Flavor Profile: Its taste is subtly sweet with a touch of peppery notes. It’s light and crunchy, making it a great addition to many dishes.

Cooking with Napa Cabbage

Napa cabbage is like a culinary chameleon, ready to shine in various recipes:

1. Crispy Salads: Chop it up and toss it into your salads for a delightful crunch.

2. Stir-Fry Star: Its mild flavor makes it a great fit for stir-fries, soaking up all those tasty sauces.

3. Kimchi Classic: Napa cabbage is the secret to Korean kimchi, the spicy and iconic side dish.

4. Soups and Stews: Let it soften in soups and stews, adding a subtle sweetness to the broth.

5. Wrap It Up: Use Napa cabbage leaves as a healthier alternative to wraps or tortillas.

6. Pickle Pleasure: You can pickle it for a tangy and mellow flavor, perfect for side dishes.

Braised Napa Cabbage Recipe

Now, let’s dive into a simple recipe to showcase the charm of Napa cabbage:

Ingredients:

  • 1 Napa cabbage, chopped into bite-sized pieces
  • 2 tablespoons vegetable oil
  • 2 cloves garlic, minced
  • 1 tablespoon ginger, minced
  • 2 tablespoons soy sauce
  • 1/2 cup chicken or vegetable broth
  • Salt and pepper to taste
  • Sesame seeds (for garnish)

Instructions:

  1. Heat It Up: In a large pan, heat the vegetable oil over medium-high heat.
  2. Sizzle Aromatics: Add the minced garlic and ginger and sauté for about a minute until they become fragrant.
  3. Add Napa Cabbage: Toss in the chopped Napa cabbage and stir-fry for 2-3 minutes until it starts to wilt.
  4. Flavor Boost: Drizzle the soy sauce over the cabbage. Stir to coat the cabbage evenly with that savory goodness.
  5. Simmer and Season: Pour in the broth and season with a pinch of salt and pepper. Lower the heat, cover, and let it simmer for 5-7 minutes until the cabbage becomes tender but still has a little crunch.
  6. Serve with Style: Transfer your braised Napa cabbage to a serving dish, and sprinkle sesame seeds on top for an extra crunch and nutty flavor.

This braised Napa cabbage is a simple and tasty side dish that highlights its mild and sweet character. Its tender yet slightly crisp texture combined with savory flavors is a win-win.

Enjoy your Napa cabbage from Local Harvest Delivery, and happy cooking!